Menubar
Menubar
Main Menu
 The main menu bar includes six key sections: Home, Program, Manual, I/O, Settings, and Applications. For detailed information and function of each section, please refer to the corresponding page.
Auxiliary Functions

This section provides the following functions:
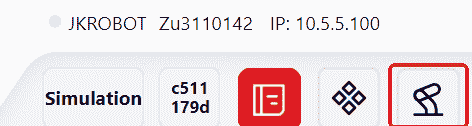
View Robot Information
The robot's status can be showed by the color of the ring-shaped light:
Gray: Not powered on, not enabled.
Blue: Powered on, but not enabled.
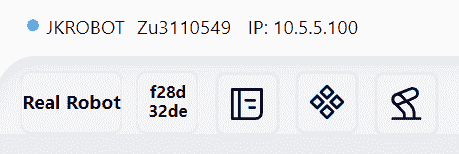
Green: Powered on and enabled.
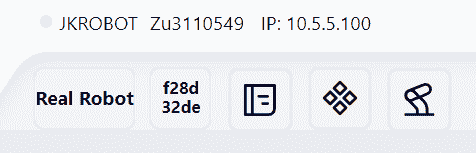
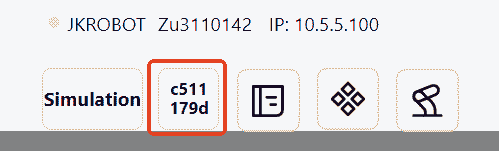
View the robot's name, robot serial number, and IP address:
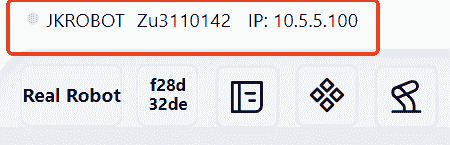
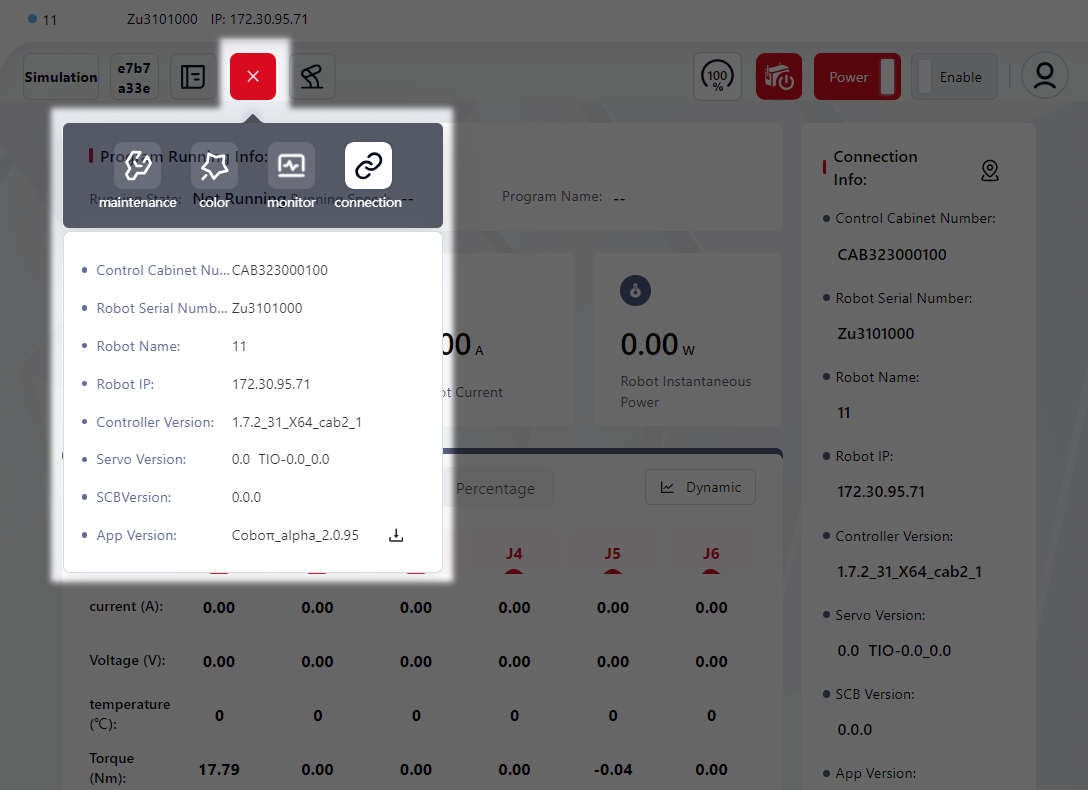
Click on any part of the name, robot serial number, or IP address to view detailed robot information, including controller version, servo version, SCB version and so on:
Note:
This detailed information is part of the Toolkit feature, which is explained in a later section.
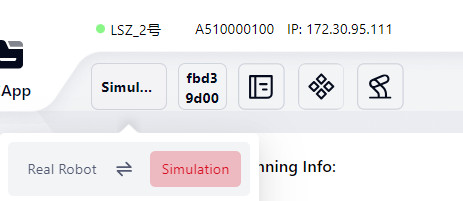
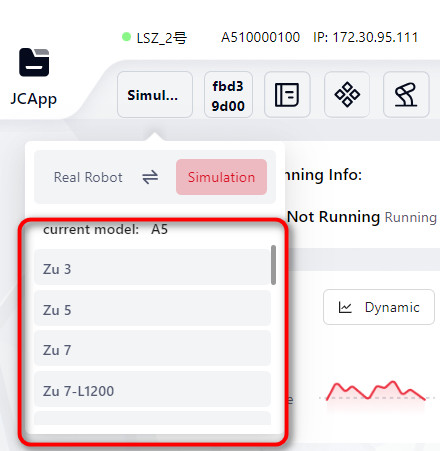
Switch Robot Mode and Model
Note:
This feature can only be used when the robot is not powered on and enabled.
Click to switch robot mode:
Click to switch robot model:
Log

Click on the icon above to access the robot logs, which include System Log and User Log.
System Log
Users can view All types of operation logs on this page, or filter by selecting specific categories such as Info Warning Error. Each category is visually differentiated by unique icons and colors for easy identification.

The Operation Date field allows users to define a custom time range for log retrieval, or to quickly select from preset options like Last 3 Days Last Week.
Keyword-based searches are also supported for targeted queries.
On the right, use the Reset Refresh Export buttons to perform corresponding actions on the logs.
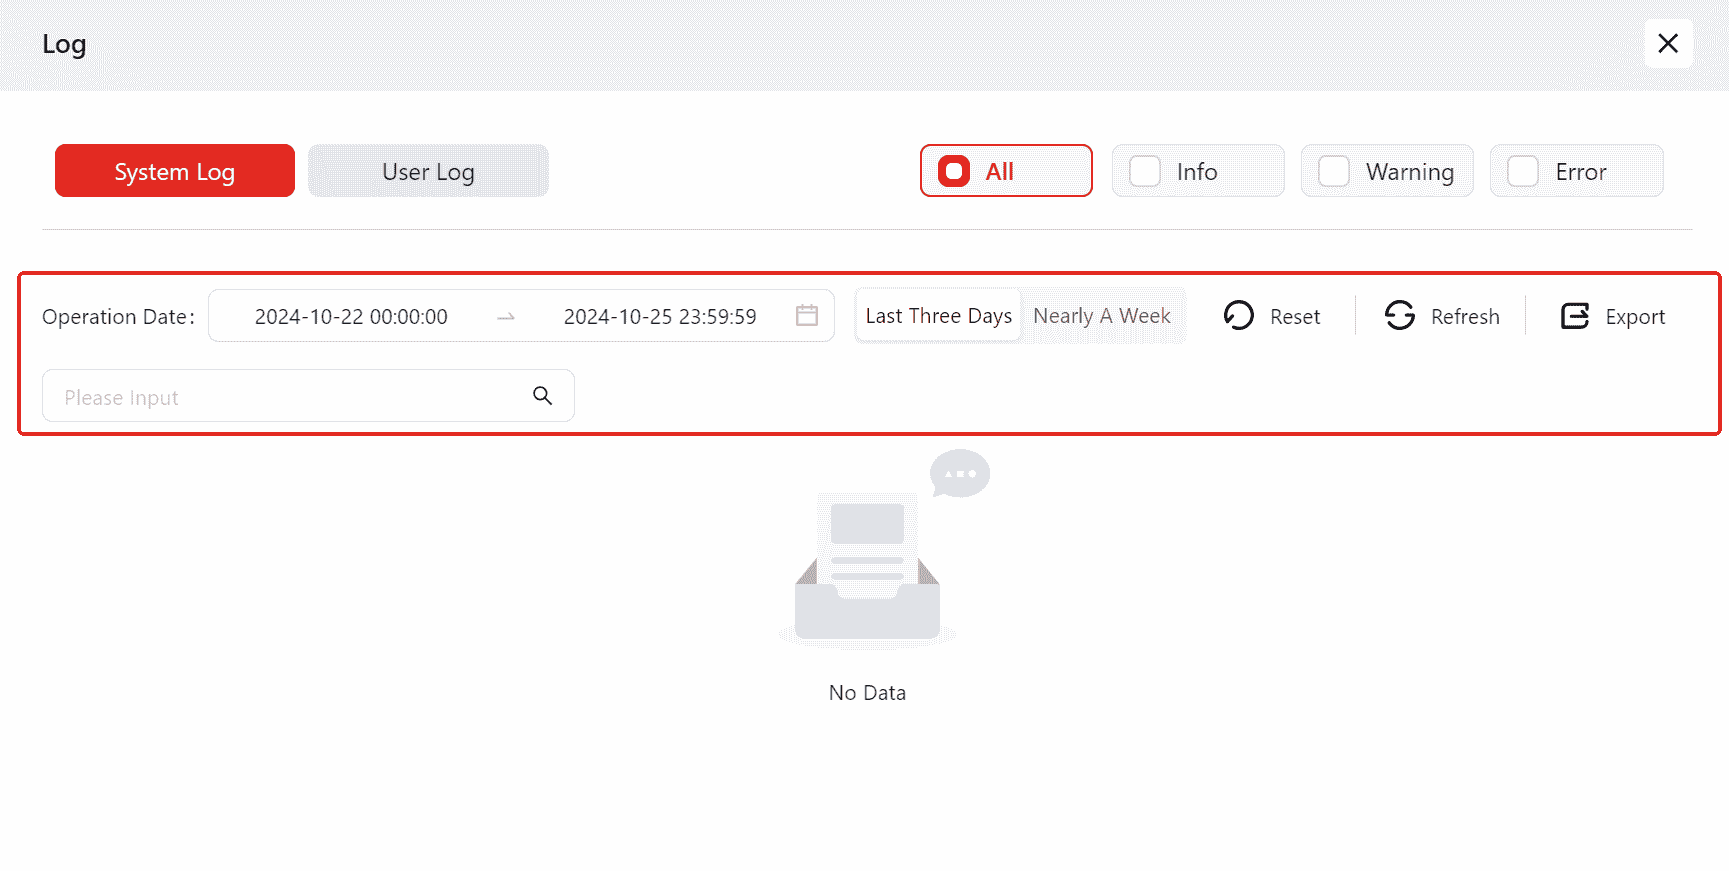
Detailed Operation Information is displayed chronologically by identifier within the page.
Hovering over any log entry reveals a tip.
Clicking on any log entry will provide a detailed explanation of that specific log.
User Log
This page enables access to user logs.

All operations are consistent with those described above.
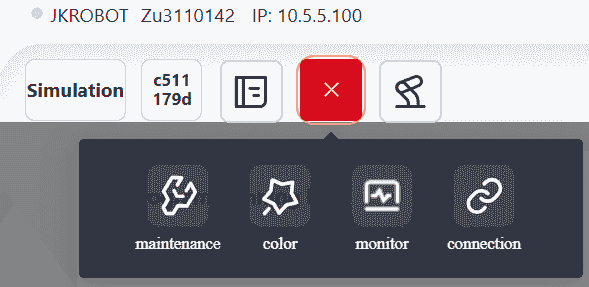
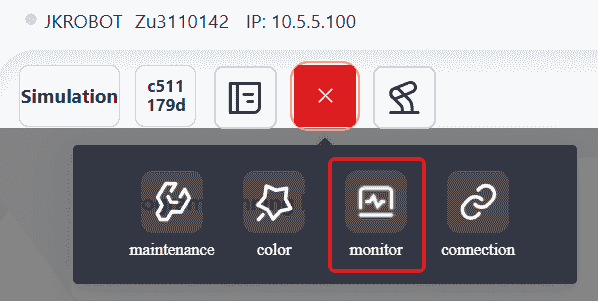
Toolkit
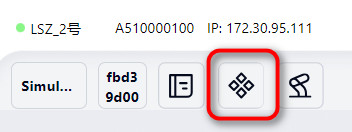
Click this icon to open the toolkit, which includes four features Maintenance Mode Theme Settings Monitoring Information Robot Details
Maintenance Mode
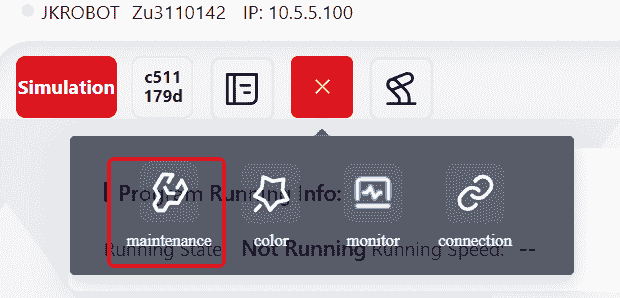
Note:
This mode is currently only available to developers and is not yet open to users, so it will not be introduced here.
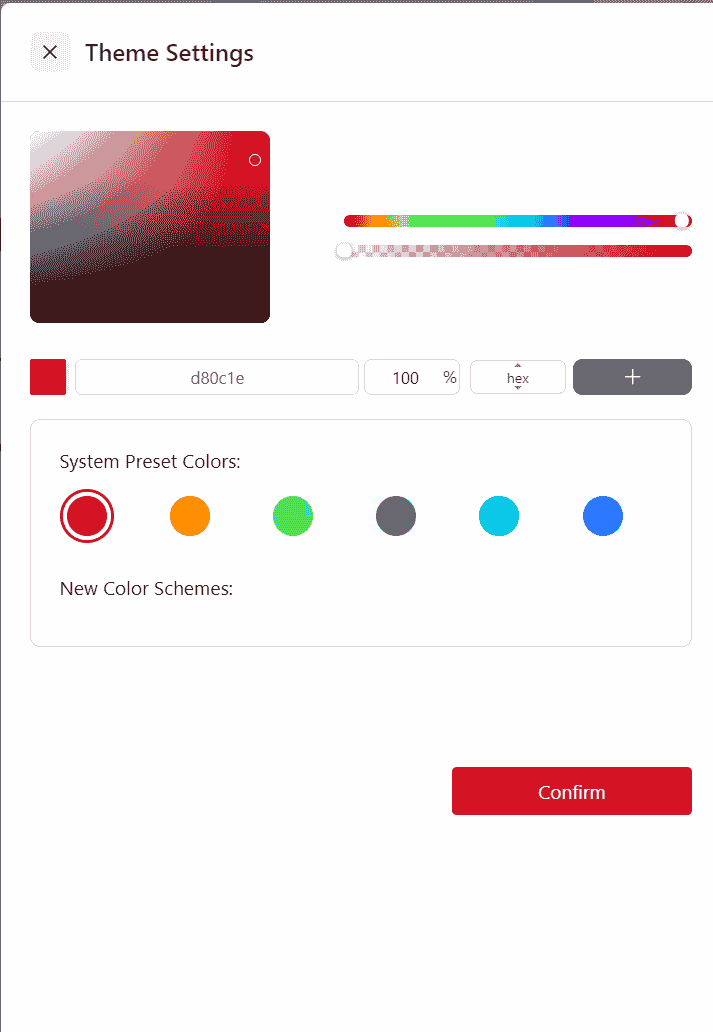
Theme Settings
Click this icon to open Theme Settings and customize the system colors.
Select from the System Preset Colors;
Choose a color from the color bar, adjust specific color parameters, and click + to save it under New Set Colors . Saved colors can be deleted by clicking the button in the top right corner of the color icon.
After selecting a color, click Confirm to apply.
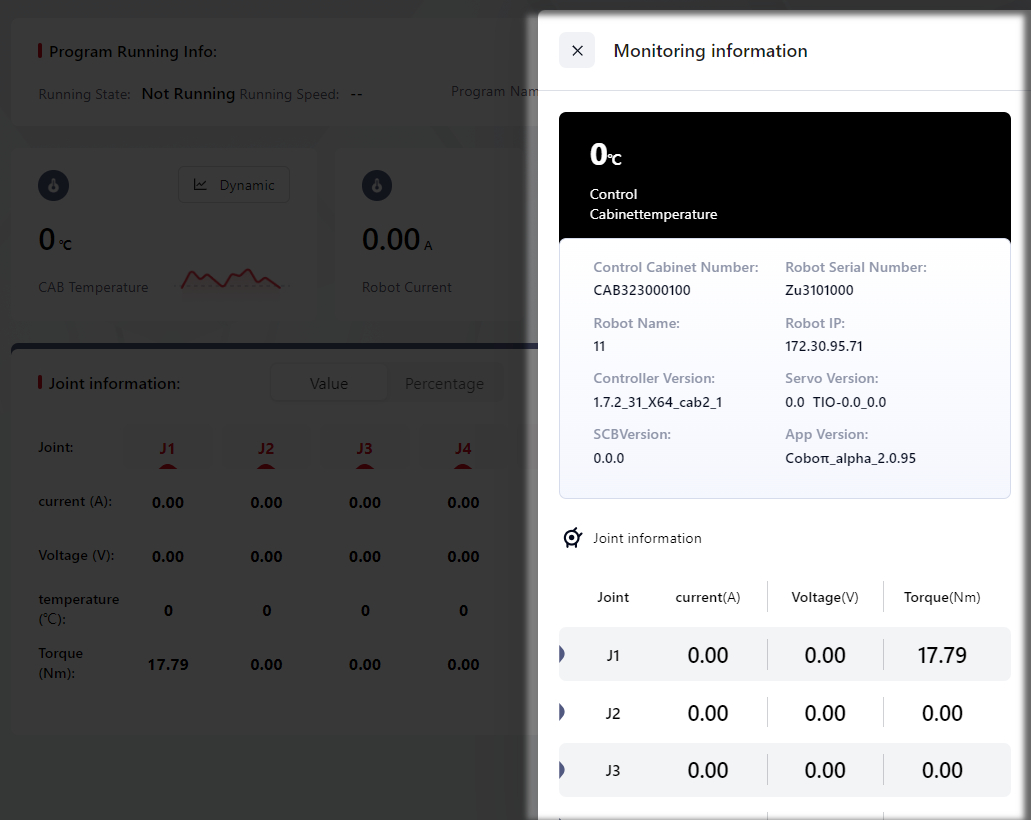
Monitoring Information
Click this icon to open Monitoring Information and view real-time information about the robot, including: Control Cabinet Temperature, Robot Current, Robot Instantaneous Power, Robot Name, Control Cabinet Number, Robot Serial Number, Robot IP, Controller Version, Servo Version, SCB Version, as well as the Current, Voltage and Torque information of each of the robot's joints.
Robot Detailed Information

Click this icon to view detailed robot information, including: Robot Name, Robot Serial Number, Robot IP, Controller Version, Servo Version, SCB Version ant etc.
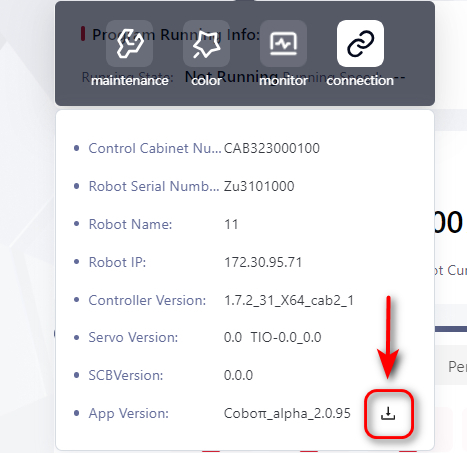
172 introduces the Coboπ operation log download feature. By clicking the download icon, users can download the operation logs of Coboπ to their local device. This enhancement enables technical personnel to efficiently troubleshoot and quickly pinpoint issues using the downloaded logs.
Safety Information
Click this icon to View the robot's safety information as follows:
Joint Information
This page shows information related to the robot's joints:

Safety State Output
This page displays the safety-related statuses the robot is currently in:
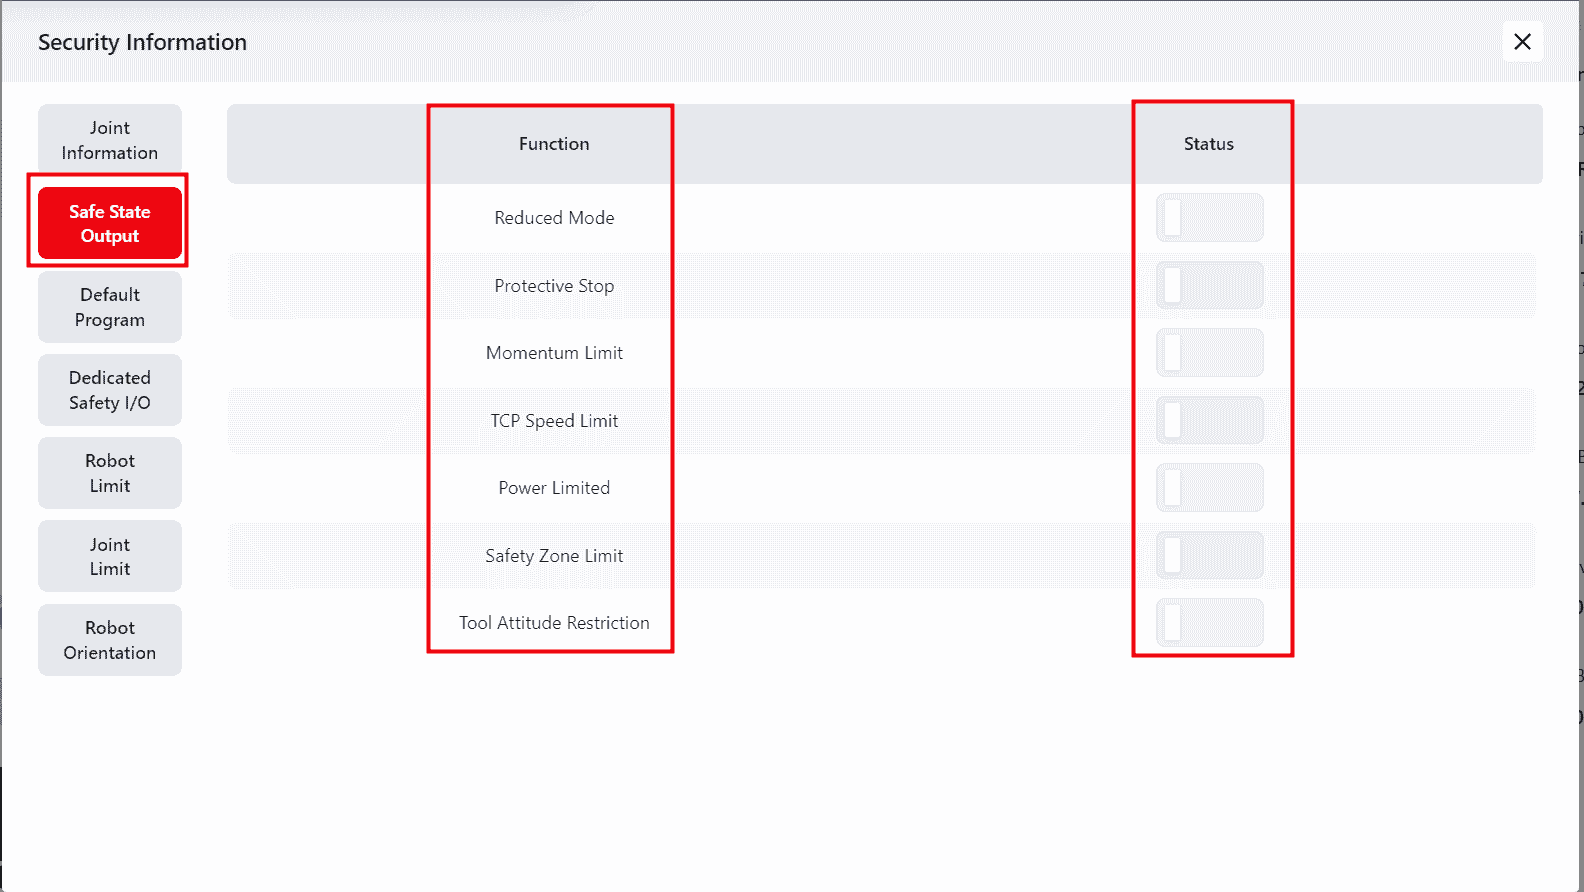
Note:
If the robot is in a particular status, the corresponding indicator light will be colored to match the color selected in Theme Settings
Default Program
This page shows the default program selected for the robot to run in its current state. Selected programs are in dark gray. Unselected are in light gray:

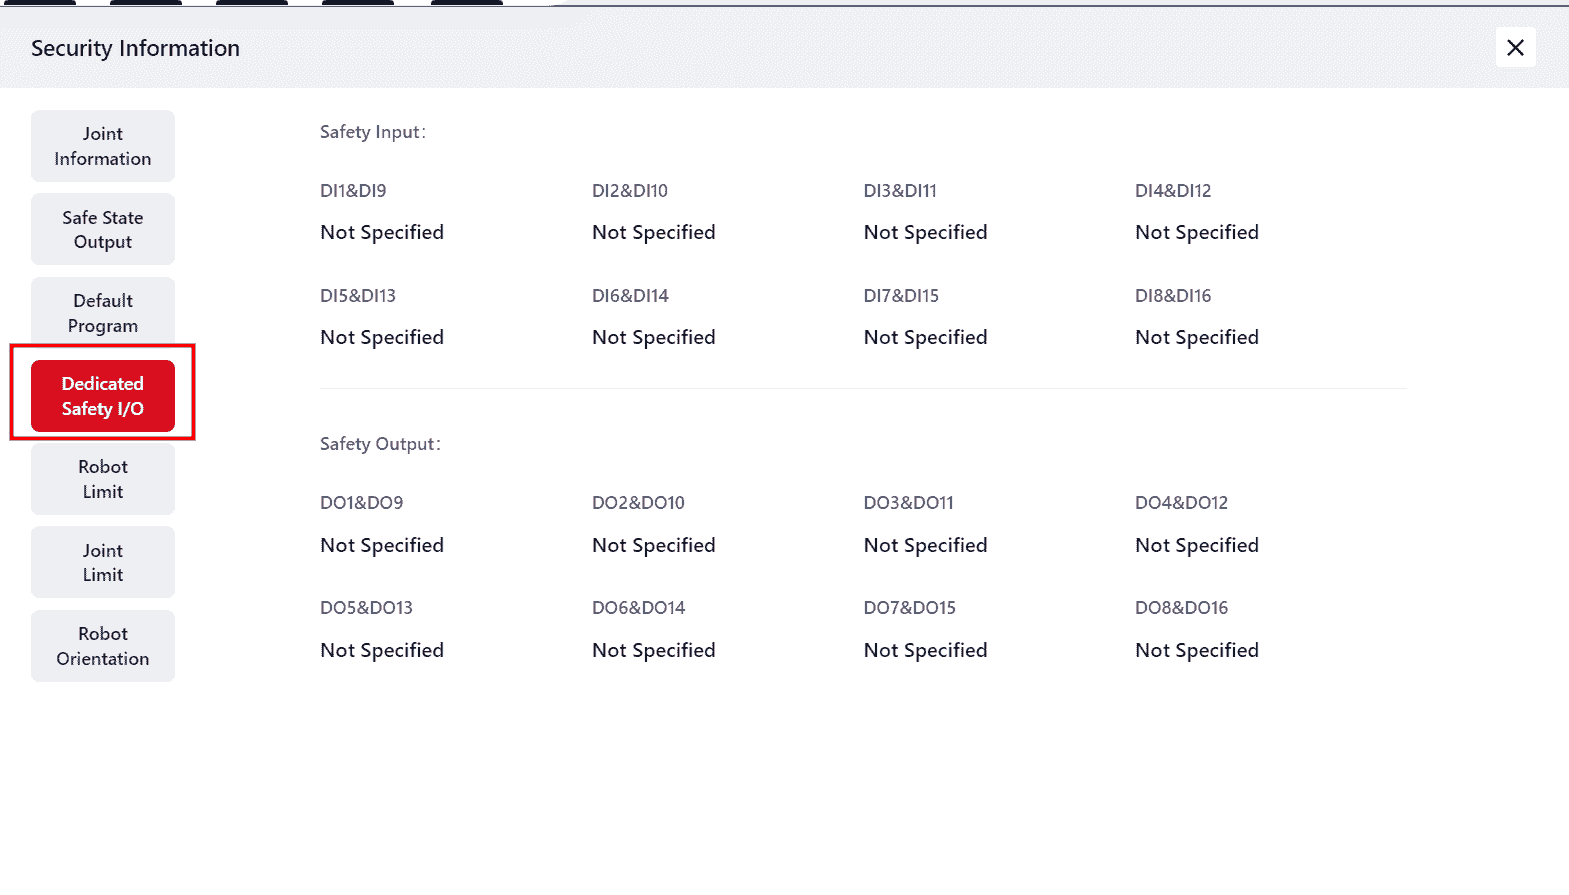
Dedicated Safety IO
This page displays the signal status of the robot's dedicated safety IO:
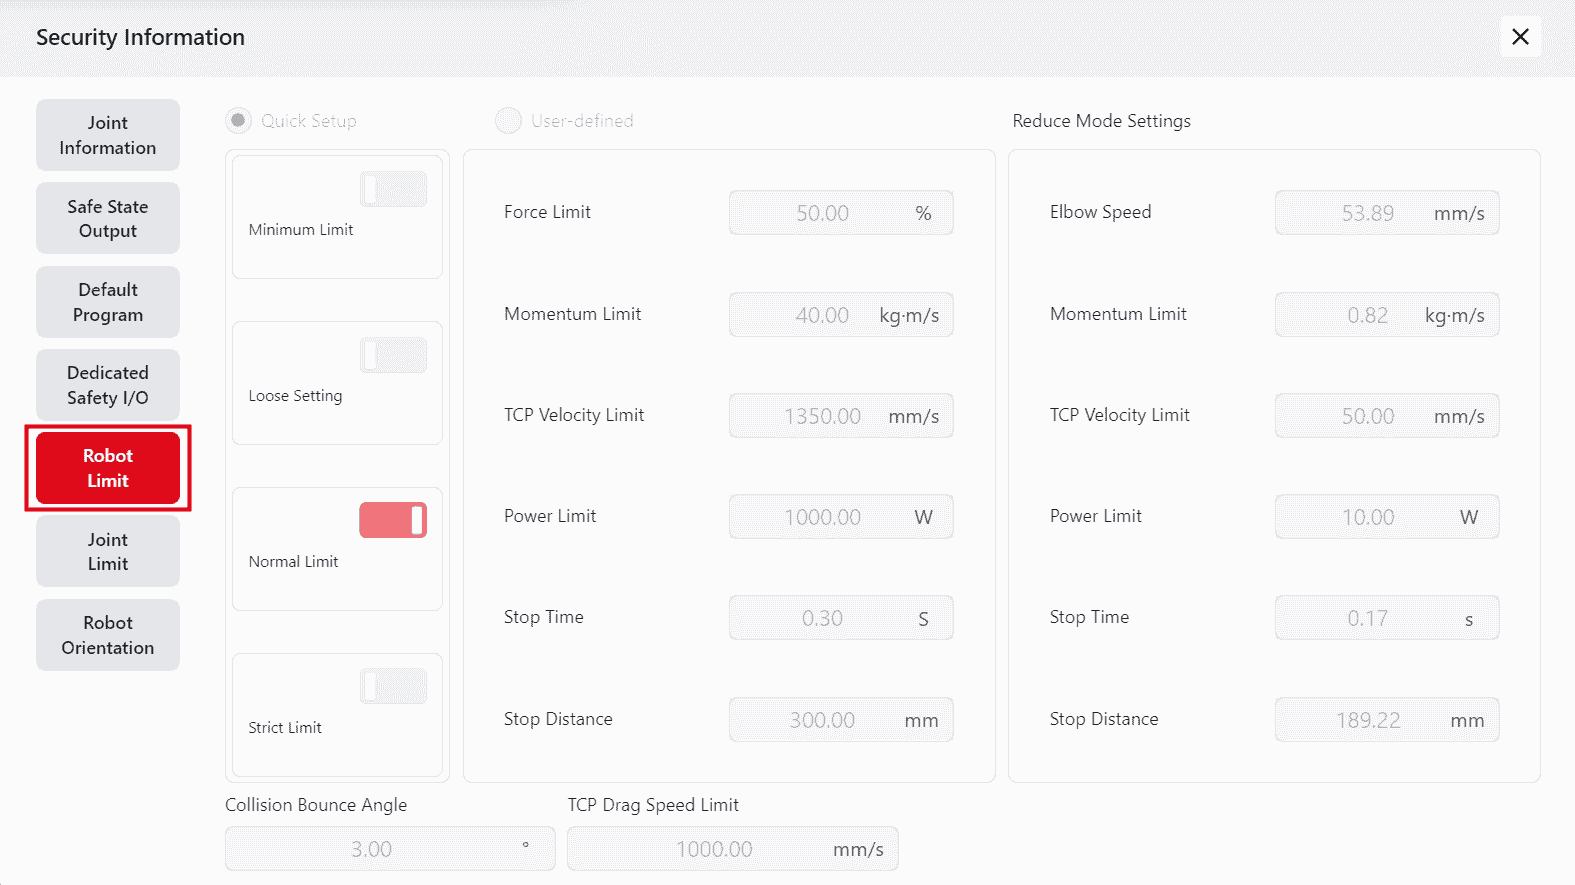
Robot Restrictions
This page shows the movement restrictions currently applied to the robot:
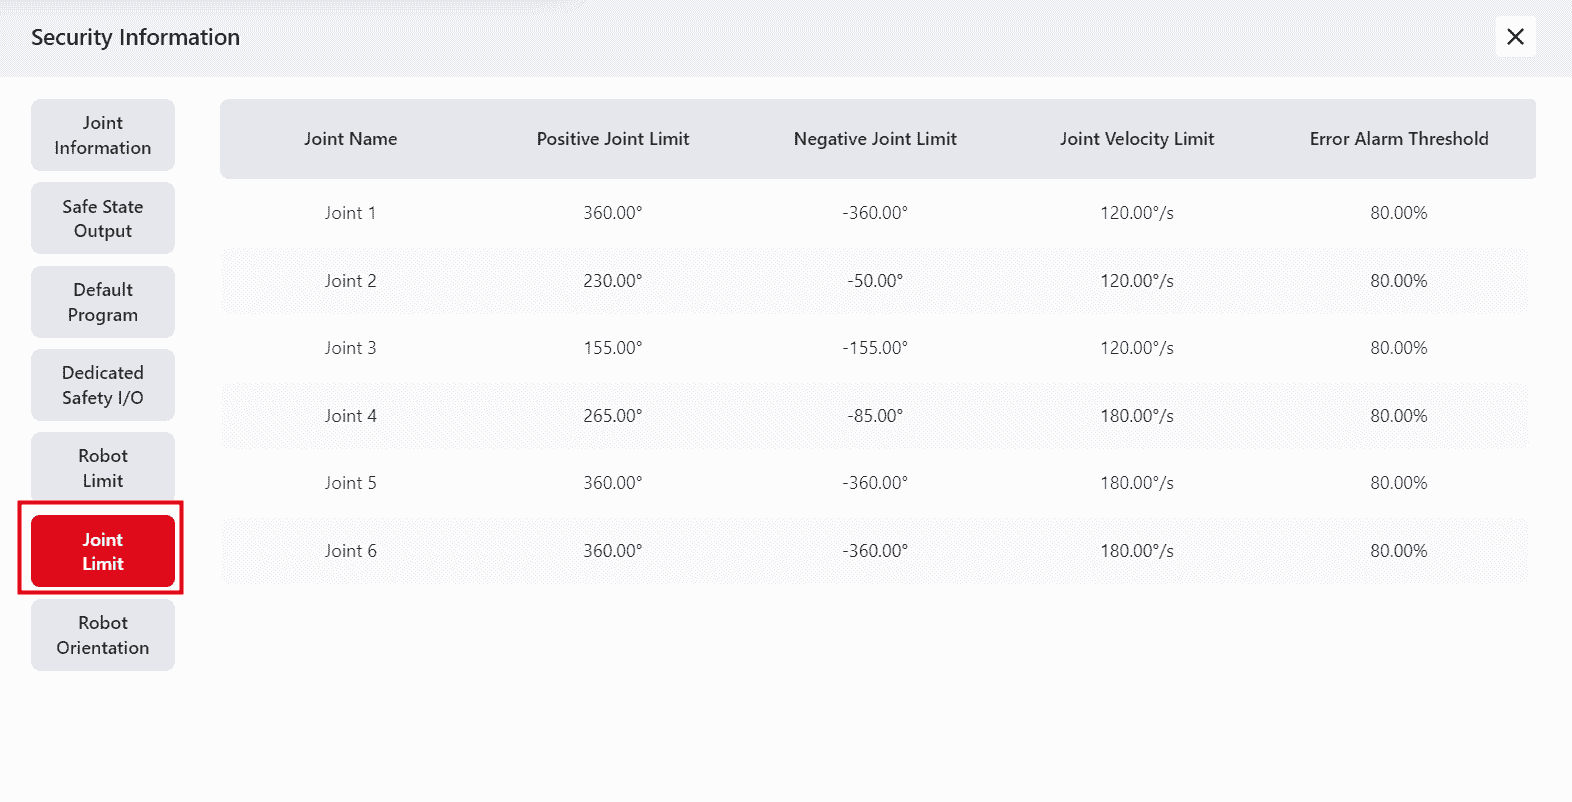
Joint Limits
This page shows the joint limit information for the robot:
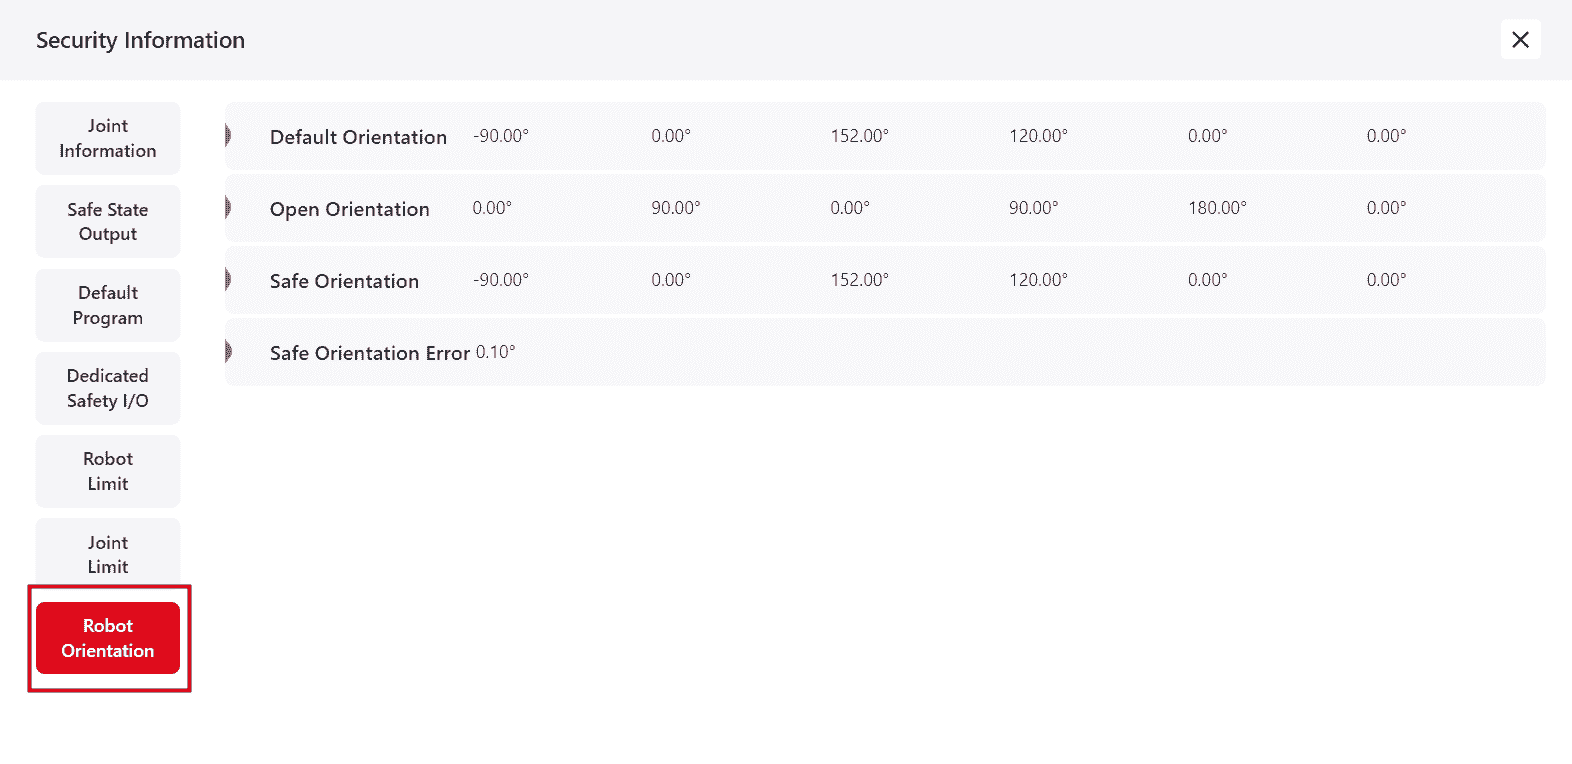
Robot Orientation
This page displays different orientation information of the robot:
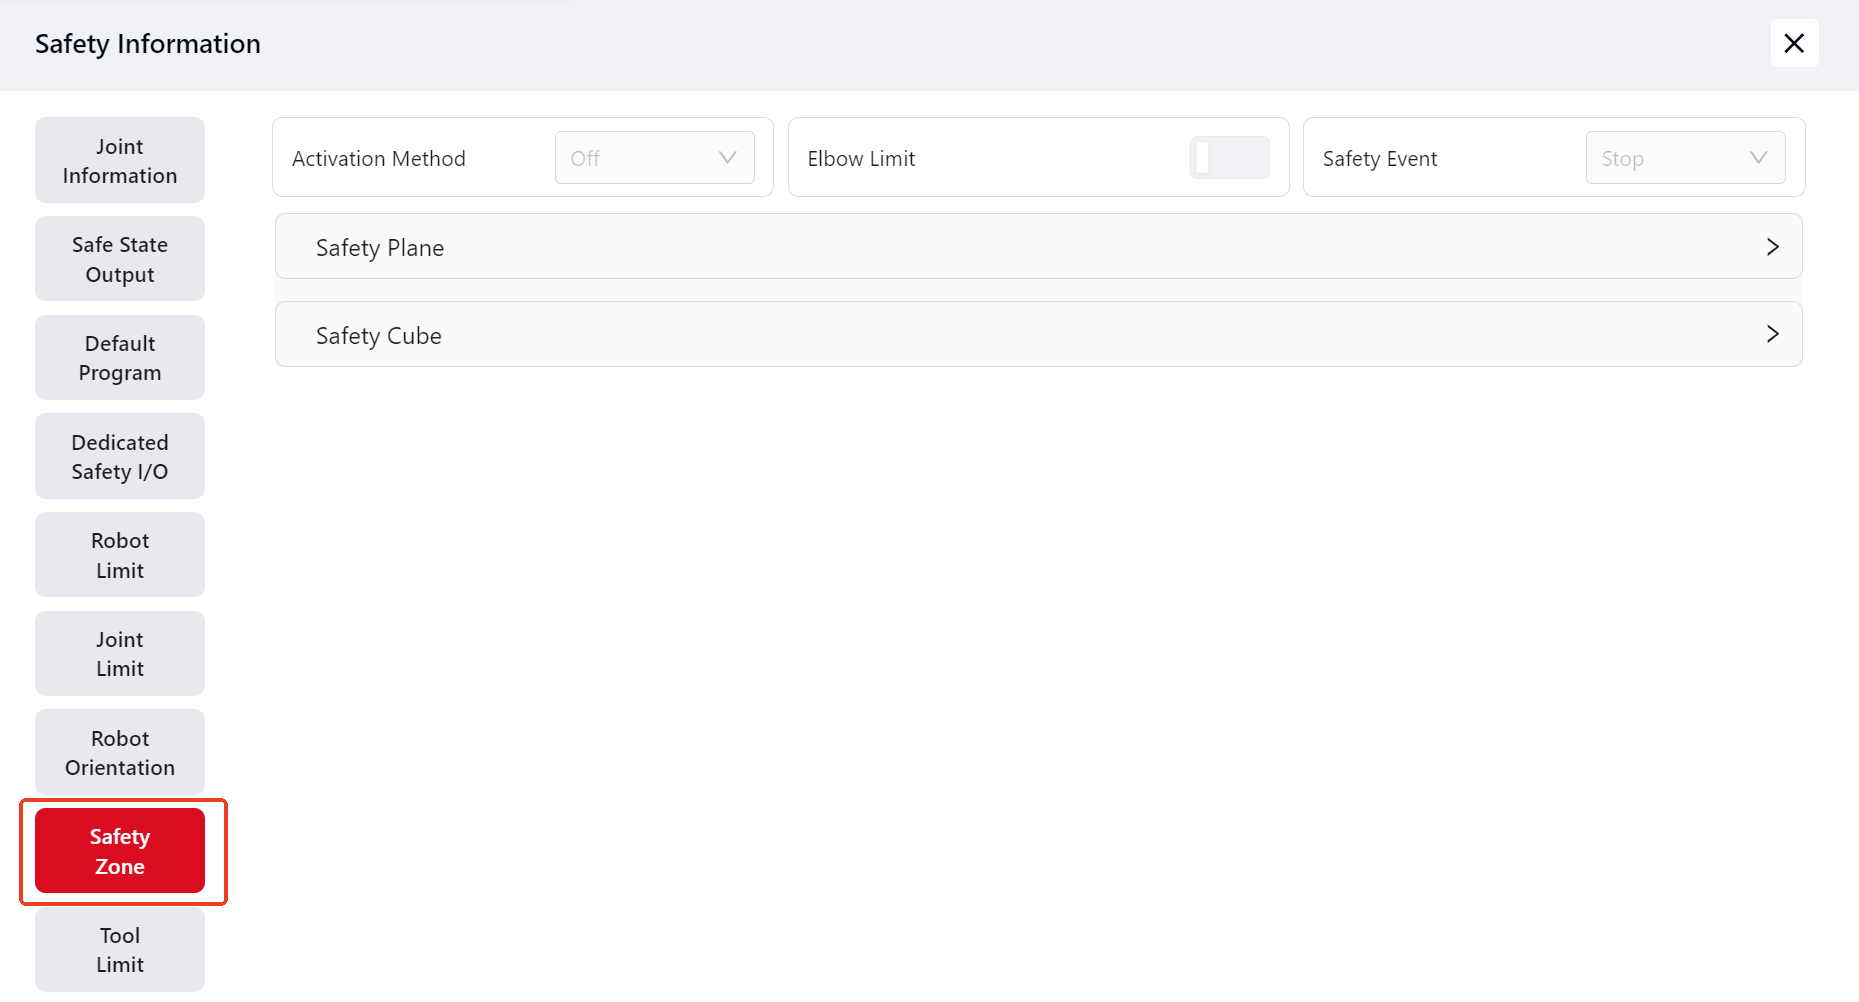
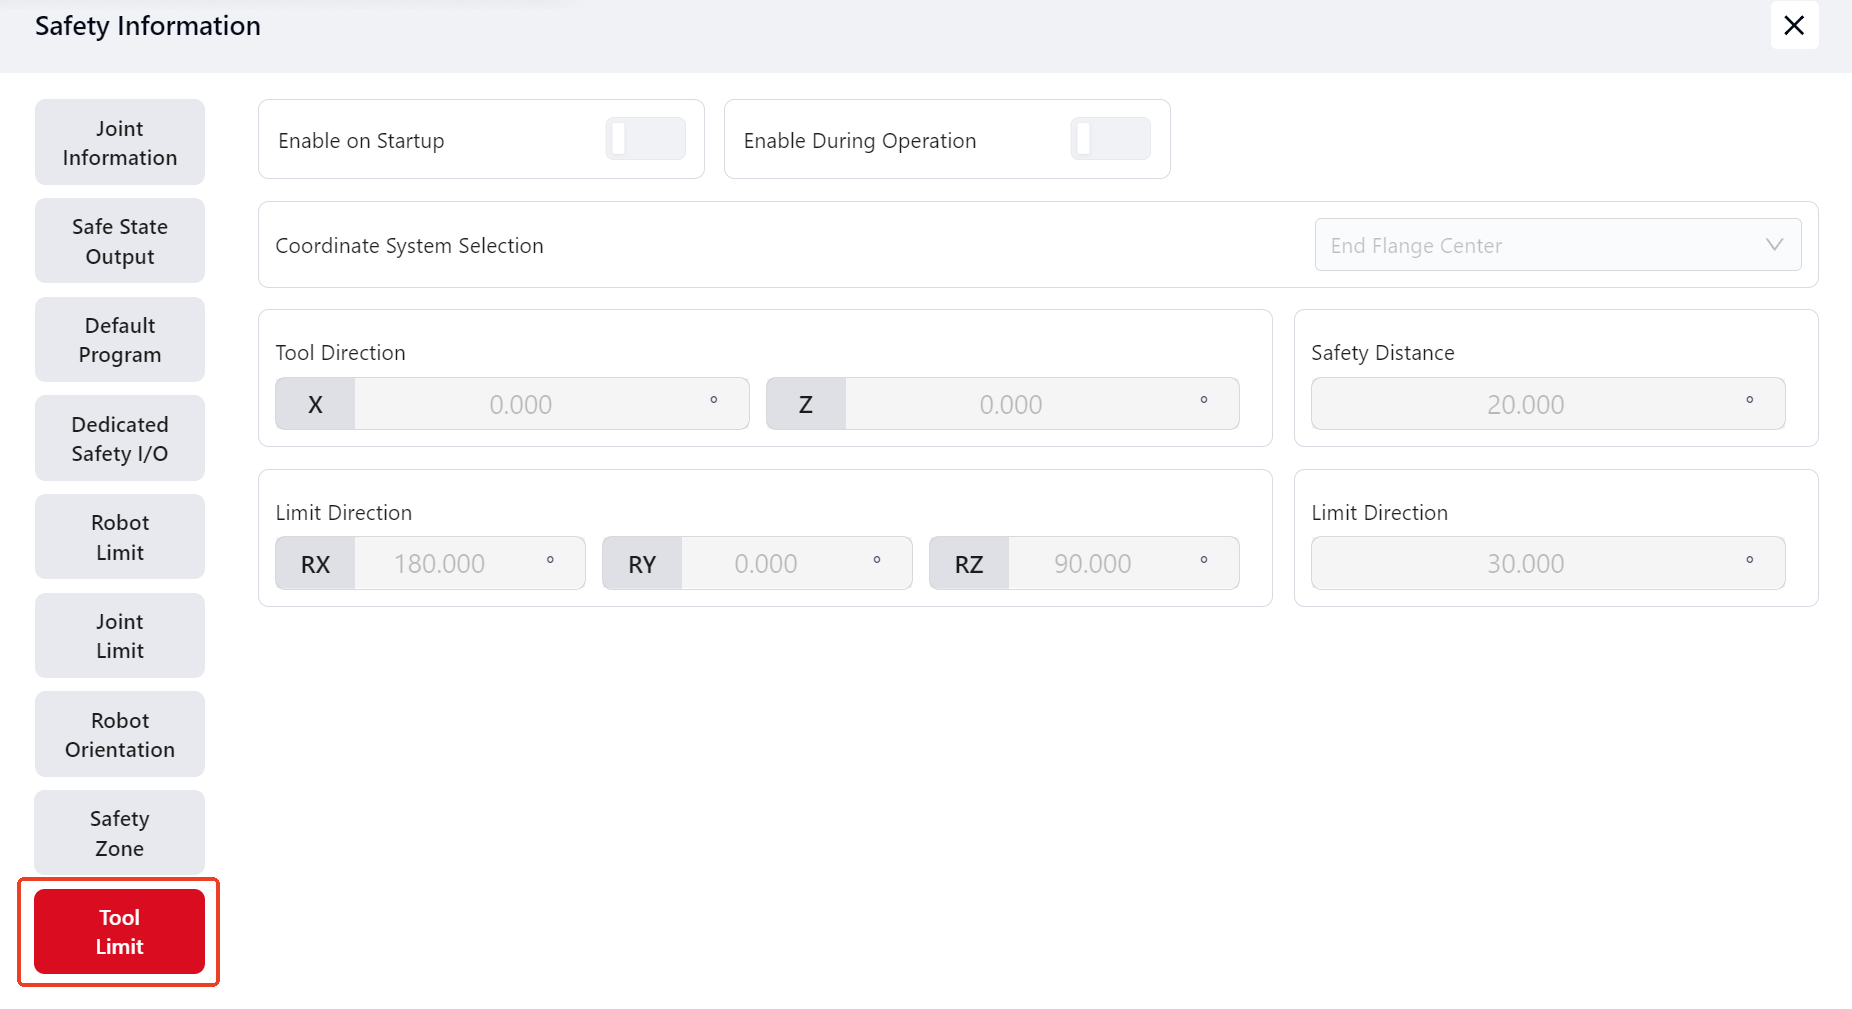
In version 172, two additional robot safety statuses have been added to the interface for viewing:
Safety Zone
Tool Limit
Switching and Connecting to Another Robot
Click this icon to switch and connect to another robot.
In the pop-up page, select the desired robot. Enter relevant information in the search box to search directly or filter by robot status under All .
The Refresh button can be used to update the list of available robots.
Select a robot labeled Connectable to connect.
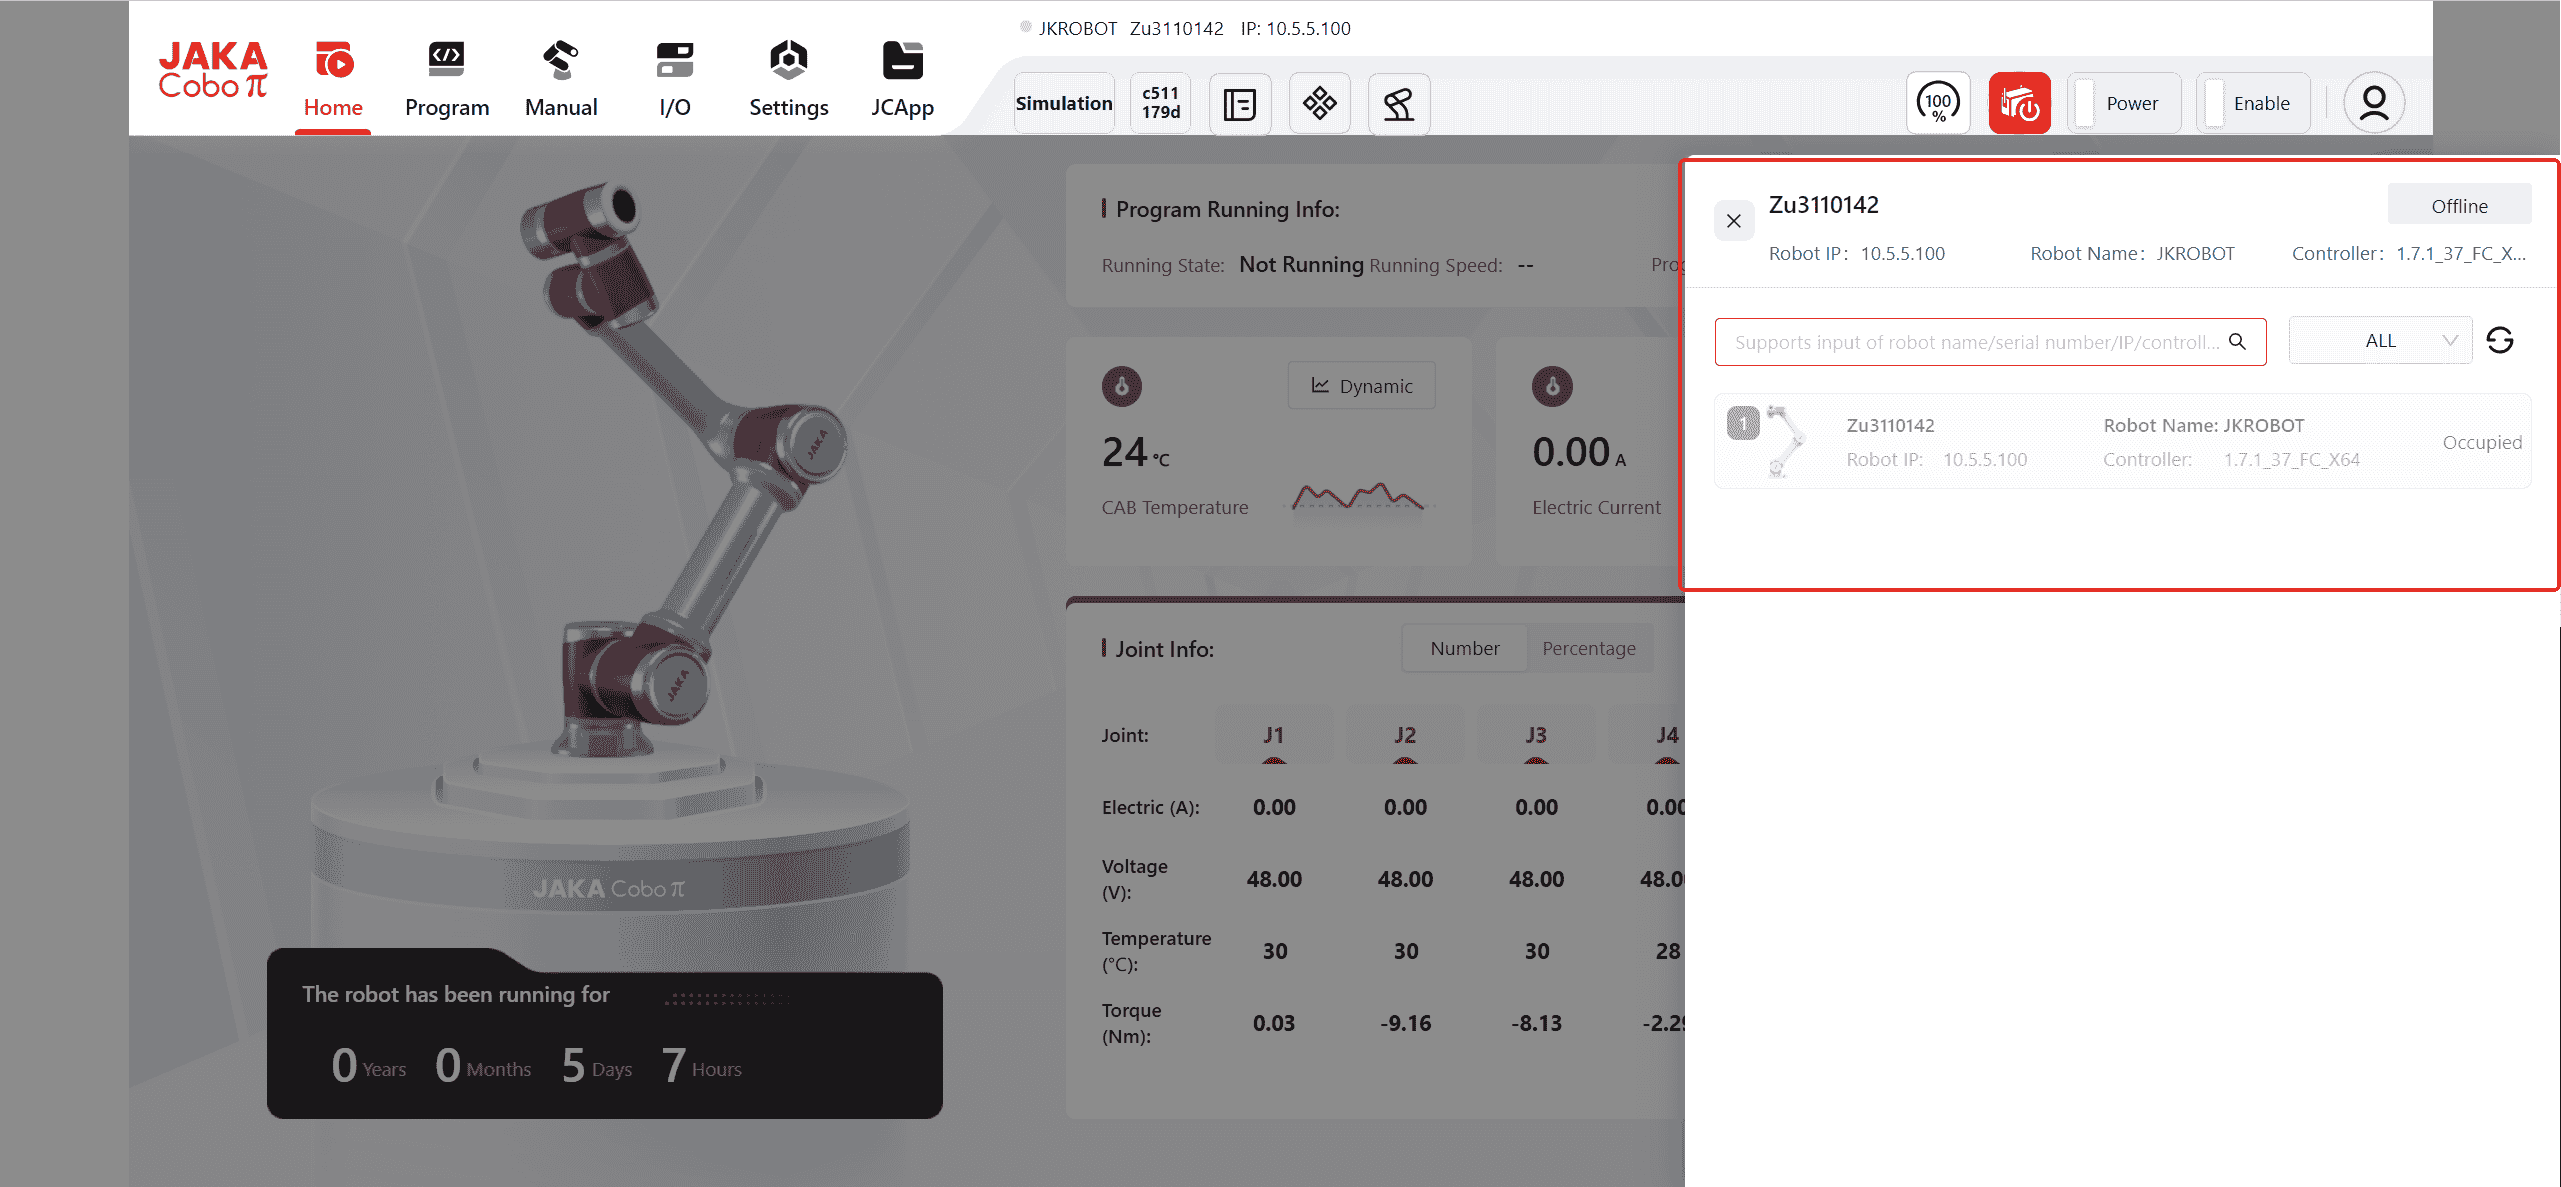
After clicking, the interface to connect to the robot will appear, with operations similar to the initial login.

Robot Control Buttons

The control buttons in this section provide four main functions:
To Control Speed
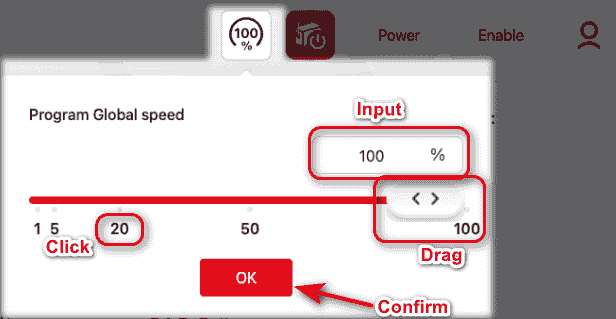
Click this icon to control the robot's operating speed within the program. A value (ranging from 1-100) can be entered, or the slider can be adjusted to change the speed.
To Power Down the Control Cabinet
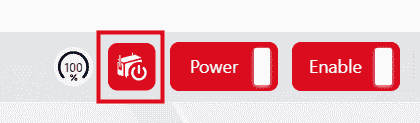
Clicking this icon will bring up a pop-up window, click Cancel to exit the page, or click OK to power down the control cabinet.
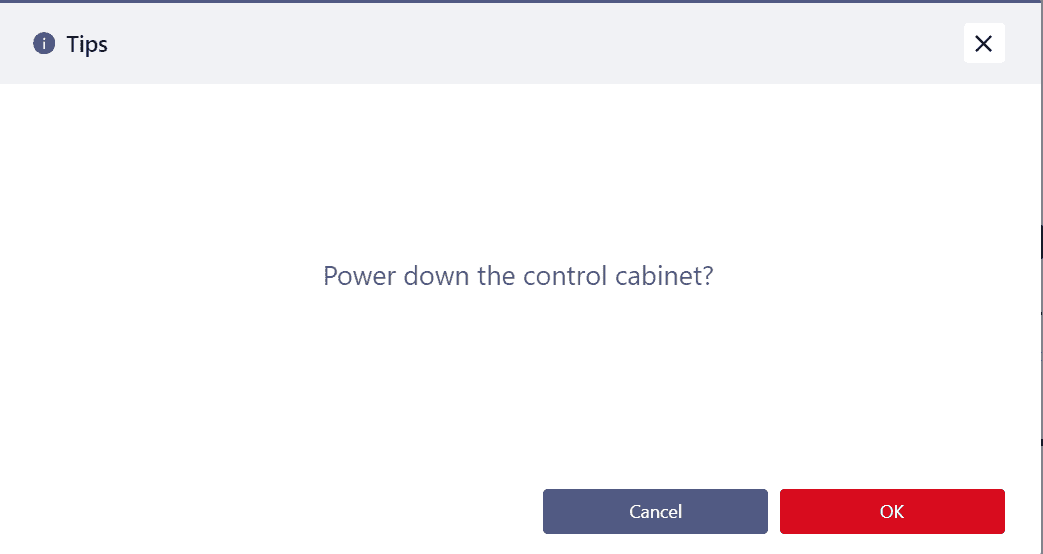
Note:
Powering down the control cabinet will also close the entire Coboπ system page.
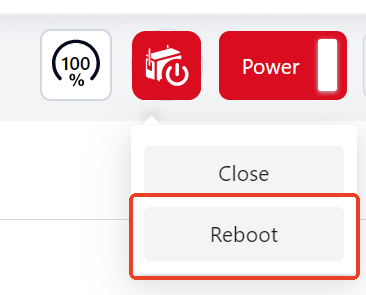
In version 172, a new Reboot button has been added. Click it can restart the system.
To Power On/Off, Enable/Disable the Robot

Click this icon to power on and enable the robot. The icon will initially appear gray, indicating that the robot is not yet powered on or enabled.
The correct order is to power on first, then enable.
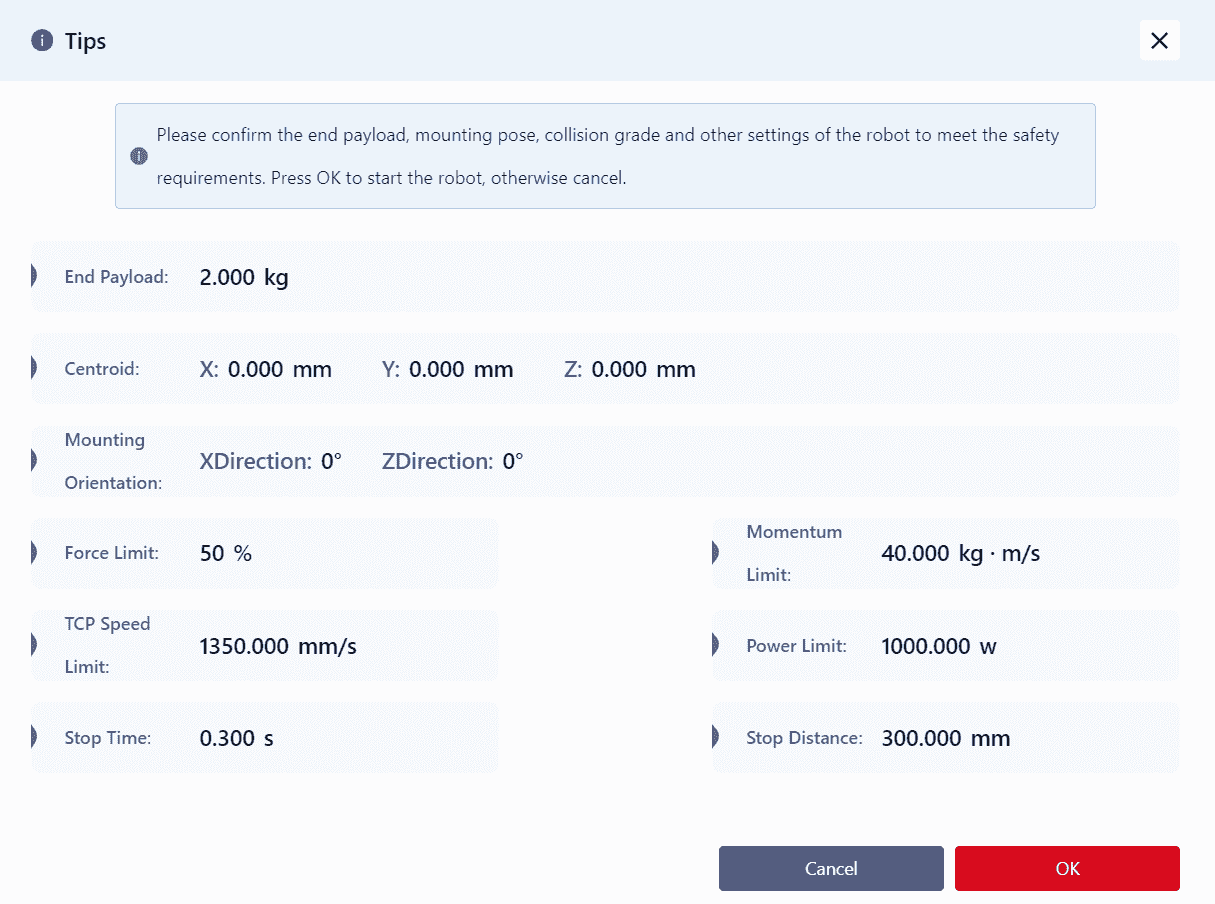
After clicking the power-on button, a pop-up will appear. Confirm the robot's relevant information in the pop-up (including:End Payload, Center of Mass, Mounting Orientation, Force Limit, TCP Speed Limit, Momentum Limit, Power Limit) and then click OK to enable the robot.

The icon will turn red, indicating that the robot is powered on and enabled.
To disable and power off the robot, click the icon again. The correct order is to disable first, then power off.
Other Information
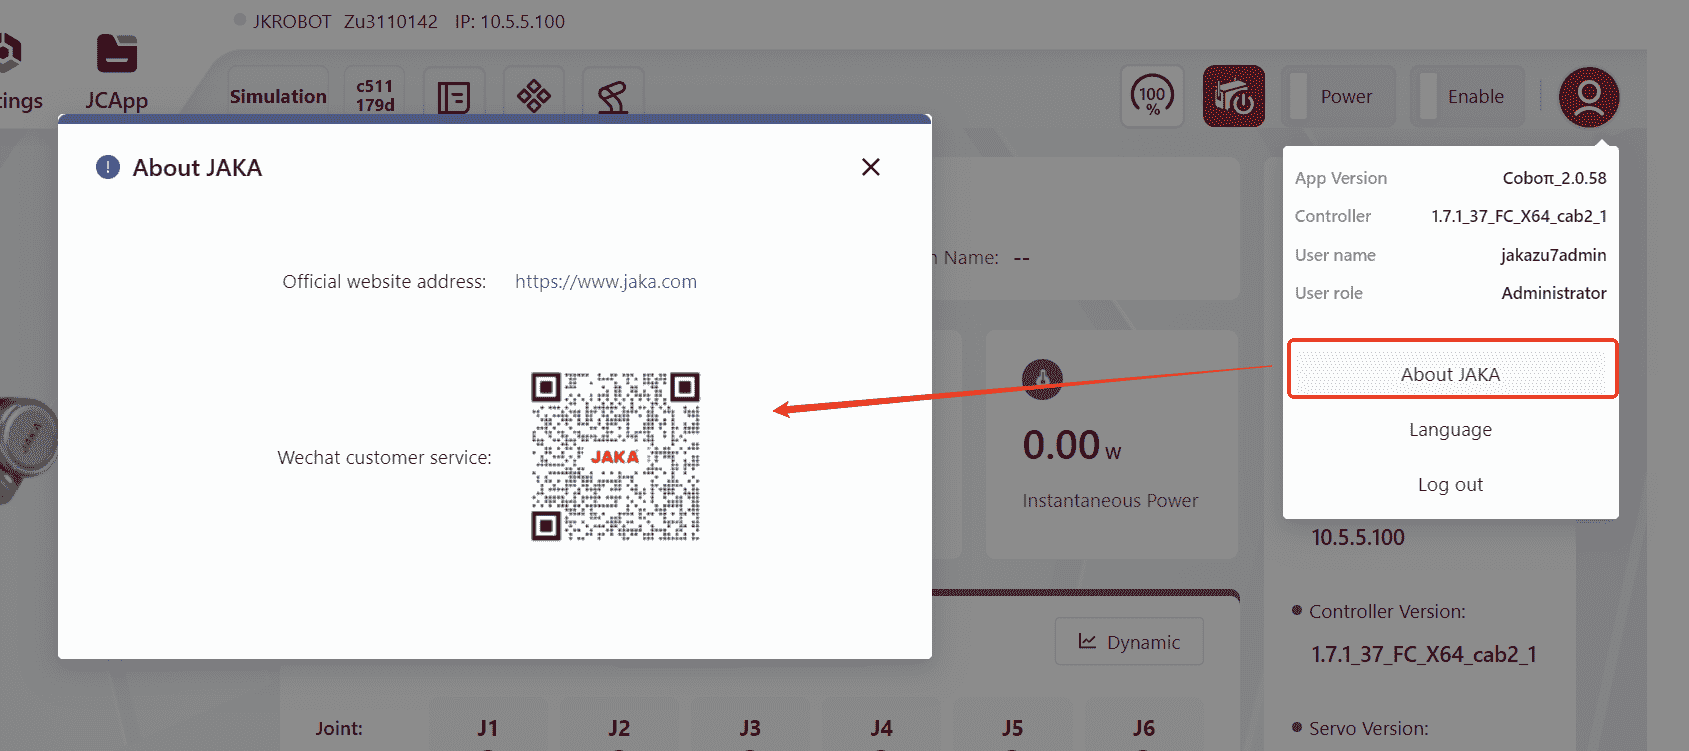
Clicking this icon allows access to additional information:
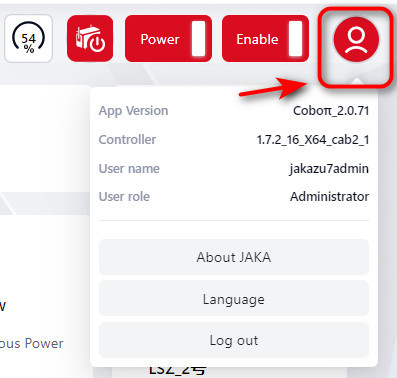
- Clicking
About JAKAto open a prompt displaying the official website and a customer service QR code, which can be clicked or scanned for access.
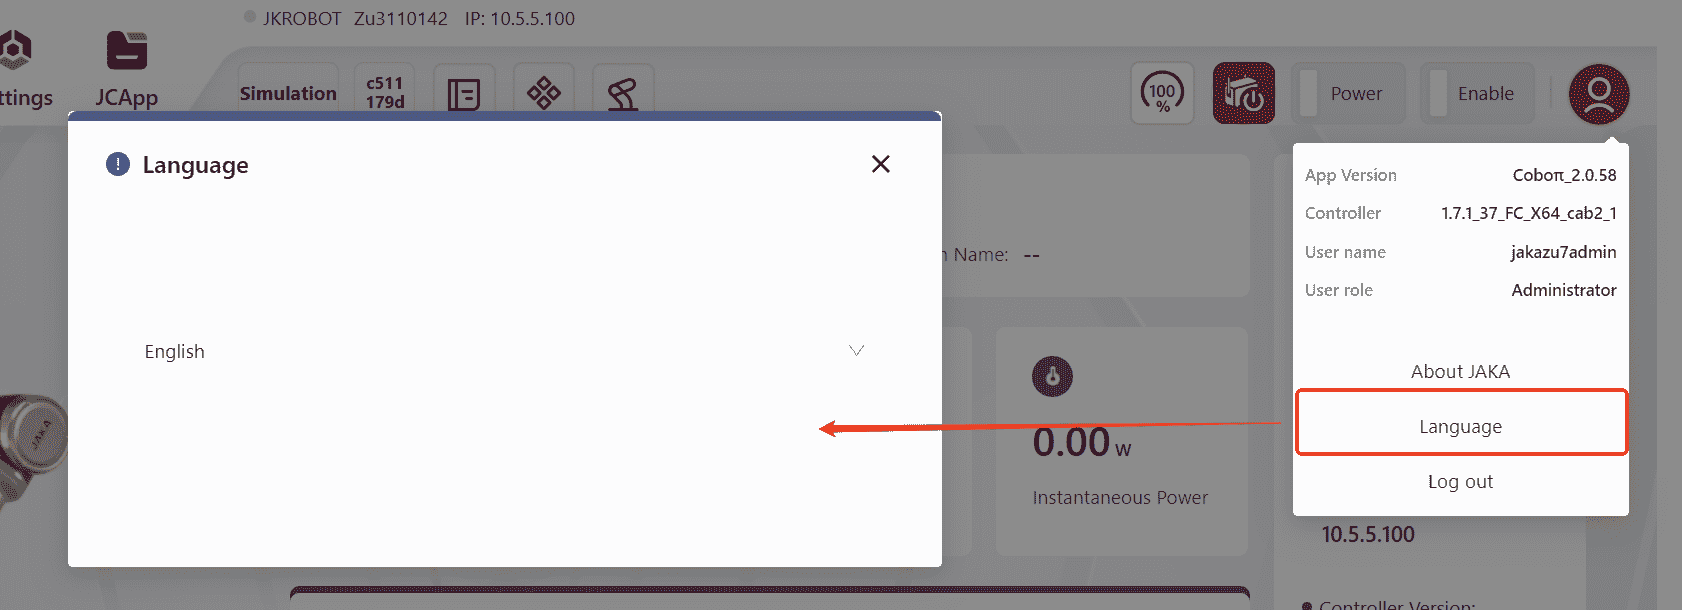
- Clicking
Languageto select different languages.

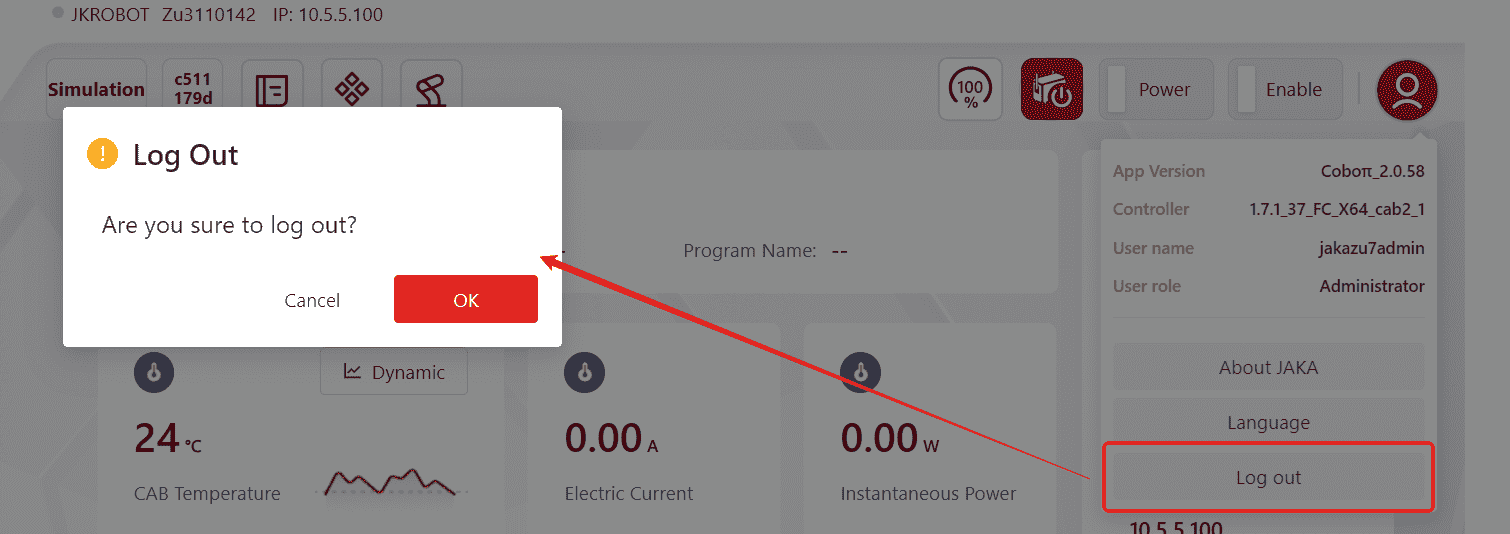
- Clicking
Log Outto log out of the Coboπ system.